Home » Posts tagged 'insulation'
Tag Archives: insulation
How to Tell When Your Ceiling Needs Professional Repair
Ceilings are a critical part of every home, protecting us from weather elements and providing insulation. Yet, they often face wear and tear that requires a professional approach.
From hairline cracks to structural issues, there are many reasons you might require Ceiling Repair Perth. Identifying and acting promptly can save you significant costs down the road.
When cracks appear in a ceiling, it can be a cause for concern. However, there are several factors that can determine whether a crack is serious and needs professional attention or not. Knowing the difference can save homeowners stress and money in the long run.
Generally, the shape and size of a crack is an indicator of its severity. Small cracks, like hairline and spider web cracks are often a result of building materials shifting or moving within the structure of a home. These types of cracks are usually harmless and don’t require any immediate action. However, cracks that are wide and long indicate a more serious problem and should be inspected by a professional.
These longer cracks are most likely caused by water damage. When a ceiling is exposed to moisture, it will expand and then contract once the water dries. This repeated movement can cause cracks in the ceiling over time. Cracks that extend from the ceiling to the walls are also a sign of structural damage and should be addressed immediately by a professional.
It is important to get a professional assessment of your home if you notice a crack in the ceiling. A professional can identify the source of the crack and make the necessary repairs to prevent further damage to your home or office.
Taking the correct steps in repairing a ceiling crack will help you to keep your property safe and sound for years to come. Having the right knowledge of what types of cracks are safe to ignore and which require immediate attention can prevent more expensive problems from developing down the road.
When repairing a crack, it is best to start by laying down a tarp or piece of plastic in the area where you will be working to catch any debris that may fall. Once you have placed the tarp or plastic, set up a ladder so that you can work safely. Ensure that the ladder is stable and that it can support your weight before using it to work on the ceiling. When you are ready to begin, spread a thin coat of joint compound over the entire cracked surface, being sure to cover the tape and screw heads. Ensure that the last coat is slightly lighter in color as this will help to conceal the repair.
Water Stains
Water stains aren’t just unsightly; they can also indicate a serious problem that needs to be addressed. If ignored, the spot may bleed out into other areas of the home, contributing to mold growth and a host of other issues that can lead to health problems for you and your family.
One of the most common reasons for water stains is a leaky roof. Perhaps a recent storm has caused some shingles to come loose, or an old chimney has cracked and is letting rainwater seep into the attic. Whatever the reason, a leaky roof is a serious problem that should be addressed immediately.
Leaking pipes can also be the cause of water stains. If you suspect this is the case, check to see if the stain is in close proximity to a sink, toilet or other plumbing fixture. If it is, then you should shut off the water to that area of your home and call a plumber.
If the stains are isolated to one area of your ceiling, they’re likely caused by condensation. This can be a result of poor insulation, insufficient attic ventilation, or even just high humidity levels in the home. In this case, it’s important to improve your home’s ventilation and humidity levels to prevent moisture infiltration and stop the stains from appearing.
If a water stain is caused by a leaky roof, or by a faulty pipe, it’s crucial to locate and repair the source of the problem. Covering the water stains with paint, even with a stain-blocking primer, will not fix the problem if it isn’t resolved.
Wood Rot
Wood rot is an unsightly and dangerous problem that can lead to structural failure in your home. This decaying fungus destroys cellulose, which makes wood weak and brittle. Wood rot can take hold in many places, from support posts and beams to floor and ceiling joists. It can also lead to problems with your doors and windows, as the weakened wood can no longer support them.
If you find rot in your home, it’s important to act quickly to prevent the situation from worsening. A professional can help you repair and replace any rotting timber, and they can also advise on the best way to keep it from occurring again in the future.
In nature, wood rot is an essential part of the decomposition process. However, it’s something that sends homeowners into panic when they discover it in their homes. This is because the damage can be quite severe, leading to weakened supports, destroyed flooring and ceilings, and even collapsed roof decking. The cost to repair and replace the affected materials can run into the tens of thousands of dollars.
While rot can be hard to spot, there are some telltale signs that can give it away. Wet rot has a dark appearance and a distinct smell. It’s also soft to the touch, and if you press on it, it will sink in easily. It can be caused by a number of factors, including roof damage, leaky gutters or leaking pipes.
Dry rot is much harder to identify, but the signs are still there. The surface of the wood will have a distinctive, powdery texture and there will be deep cracking in the affected areas. This fungus is more serious than wet rot, as it can cause significant structural damage.
Both wet and dry rot require damp conditions to thrive, so the first step in preventing it is to ensure that your house is well ventilated and that any water leaks are fixed as soon as possible. The second step is to treat any affected areas with a fungicide. This can be done by removing any damaged timber, scrubbing it with a wire brush, and applying a fungicide to all surfaces within five feet of the affected area.
Poor Installation
The quality of the materials used to construct a home’s ceiling is vital to its durability and structural integrity. If poor installation techniques are employed, it can lead to a variety of issues, including cracks, water damage, and plaster damage. Regular home maintenance tasks such as painting and surface inspections can identify potential problems before they escalate, allowing for timely intervention.
Ceiling materials vary, from drywall to plaster and other traditional options, each with unique challenges and repair methods. It’s important to evaluate each issue thoroughly, as certain cracks and discoloration may indicate underlying issues that require more extensive or complex repairs.
A common issue is sagging, which occurs when the ceiling material begins to separate from its supporting structure. Depending on the cause, this can be dangerous and require immediate attention. In some cases, the ceiling may collapse if left untreated. This issue can be caused by shifting foundations, seismic activity, termite infestation, and water damage. To resolve this problem, homeowners should consult with a professional to identify the root cause and implement appropriate solutions.
Leaking ceilings are a significant source of water damage, and they often result in unsightly water stains on the surface. This is usually due to faulty plumbing or roof damage, and it’s important to identify and address the underlying cause in order to avoid further water damage and costly structural repairs down the road.
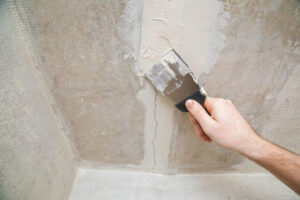
Plaster damage is a common homeowner concern, manifesting as crumbling or peeling plaster, usually due to moisture infiltration or the material’s natural aging process. To prevent this, homeowners can employ spackling and joint compound for minor repairs, while more substantial issues should be addressed by professionals using modern drywall solutions.
Changes in ceiling texture are another frequent problem, which can be caused by a number of factors. To fix this, homeowners should first use a utility knife to remove any free drywall tape, then install new tape and carefully apply 2-3 coats of joint compound, each of which must be sanded down before being painted.
Performing home repair projects involving the ceiling requires a high level of skill and experience, particularly when dealing with issues such as wood rot or structural damage. These types of issues can pose major safety risks, and they should always be addressed by a professional to ensure that the work is performed correctly.